Showing posts with label Vue. Show all posts

Tuesday, February 21, 2012

Wonderful Eye Material in Vue for DAZ Characters

This is yet another small tutorial I made for fixing materials in Vue from characters that come from DAZ.

Previously I've talked about how to fix the skin and hair materials. Now, with a bit of testing, I've come up with a good looking material that's easy to make and will give you great results. No need to purchase the eye editors for DAZ.

Some things to know:
The material I made is meant to reflect the actual scene, so it looks more natural.
Apply the material just to the CORNEA


Let's start:

You can start by selecting the Cornea material and loading the "Flat White", just completely ignore the material that came from DAZ.

On the Material Editor main tab, on the top left of the screen:

  • Make it [One sided] 
  • Click also on [Don't cast shadows]
  • Turn on [Disable caustics]
On the Highlights tab:
  • Make the [Highlight Color] something like RGB 185,192,216
  • Set [Highlight global Intensity] to 100%
  • Set [Highlight global size] to 80%
  • Set [Anisotropic highlighting] to 0%
On the Transparency tab:
  • Set [Global Transparency] to 80%
  • No [Blurred transparency]
  • [Refraction index] 1.0
  • [Flare intensity] 40%, span 10%

On reflections tab:

  • [Global Reflectivity] 30%
Now Rename your material and just save it! Use it again any time you bring a new character to Vue, just as simple as that!

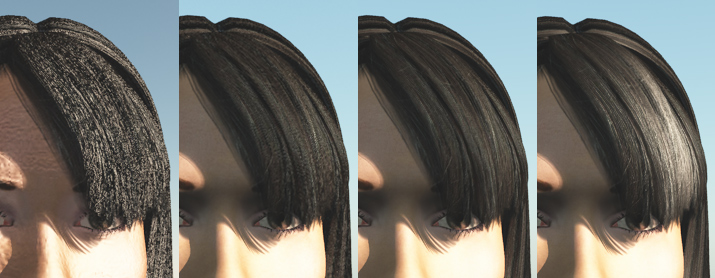
Remember this is just how I made it, you can change it to suit your needs. This is the result I got:


**The scene was rendered with Global Radiosity.

Tuesday, February 14, 2012

Fixing HAMPTON hair in Vue imported from DAZ

There are a few fixes for hair and other materials that need to be made in order to have Vue render them correctly. In another post I made, I spoke of how to fix the skin texture, but in this case we'll just focus on the hair.

First we have to fix the materials for both the skin and the hair.
For the skin, check my post Fixing Skin in Vue imported from DAZ

**Remember that some of DAZ's hairs are different from others, The hair used here was the Hampton. You might need to change the Highlight and bump settings depending on your scene or the Hair Object that you use.

Fixing the Materials for the Hair
  • Lower the bump to 0.01
  • In [Highlights] tab: Put [Highlight global intensity] and [Highlight global size] to 100%
  • Make sure you have [Variable Highlight] checked.
  • Right click on  [Highlight production] and go to Edit Function. Link Highlight to your Texture map and set it to gray-scale.
Once the material is fixed, there are still some issues that need to be checked on render quality, for example rendering with the presets sometimes brings unexpected results (like transparencies showing weird shadows)

Fixing the Render Settings

How I set up my Render settings in [User Settings] is:
  • Advanced effects quality: 50%
In the [Anti-Aliasing] have both Object and texture checked and then click on the Edit button
  • I find that [object anti-aliasing] for the hair works best in [Systematic]
  • [Subrays per Pixel] Min 6, Max 16
  • [Quality Threshold] Contrast 50% and Geometry 0%
Render testings

How the quality of the image changes with the use of materials changes and render settings.
  1. The first Image is how it rendered [Final] just after import.
  2. Second is after all materials have fixed the bump.
  3. Third image is after fixing the render settings in [User Settings].
  4. Fourth is after adding the correct highlights to my hair.
This should already give you pretty good results, but there is still one more thing. 

For realism its best to use [Global Radiosity] in your [Atmosphere Editor] [Light ] Of course its not necesary and it depends on what your scene needs, but here are some before and afters:

Your Atmosphere will change drastically how your model looks.

Tuesday, January 24, 2012

Ivy generator!

Looking at one of FireKDragon's pictures, he mentioned an ivy generator he used for his wonderful image. I started to look into it and I found it. An easy to use external, small program that will generate an ivy plant around your object!

Heres the link to the page: http://graphics.uni-konstanz.de/~luft/ivy_generator/

And quoting Drea, I put the important Vue notes she made that I use:
All of her post can be found here: http://www.yurdigital.com/forum/software-forums/vue/ivy-generator-free-tool-boost-your-forest-ruins

In Material Editor:
  • If wanted, add bump map to the color map and 
  • set bump to 0.8
  • change highlight color to a light gray
  • add backlight between 95% and 100%
For textures I used a picture I took of a ivy in a trip to the UK. It is from the Lake district near Keswick. You are welcome to use them for free if you want. You should be able to right click and download the full size. In Vue I change the trunk texture into the mossy green or something else.


Friday, November 11, 2011

Render Batch in Vue

So, I wanted to test my theory that maybe by using Batch Render I could continue renders that I had previously started rendering and had a resume render save file.

It didnt work for me. I made a test scene where I rendered the image on normal screen render and took X time. I then started the render and halfway I stopped it, for the resume render to be tested on the Batch rendering. It came out with a Fail message and the picture just didnt render. With the Batch render screen open, I then clicked on add current where it seemed to render the picture in full from the begining. And it took the same time. So no resume render.

I know this is not properly tested but I wanted to post my findings somewhere for the mean time. if i figure something else, ill update this.

So  Things to remember:

  • Dont add to the batch a resume render as it will crash
  • Prepare scenes in advance and prepare them to save to disk
  • It continues rendering on the BG so you can still work on vue
  • Add an auto-save timer that suits your purpose
Thats that for now. To be updated once I gather more info.

Wednesday, November 9, 2011

Where is the User Manual for Vue?

Yes, after more than half a year of owning Vue Espirit and some modules, I have realized that there is a PDF where i can find all the information I need for Vue and its modules!! And its right here in my hard drive.

To find it in your HD, go to:
Local Disk -> Program Files -> e-on software -> Vue 9 -> Documentation

And There you go, 616 pages of delicious Knowledge.

Friday, November 4, 2011

Fixing skin in Vue imported from Daz

One of the first things I noticed when exporting my character from Daz to Vue, was that the skin looked really bad! my characters looked like made of plastic.  

I looked at this tutorial "OPTIMIZING POSER & OTHER ITEMS FOR VUE"  and found great information with useful tips! 

On this post I just highlight quickly what i need to remember to set up next time I import. If you want to read more detailed all the useful things they have over there, I really recommend it. But for now ill put here the quick list for what I have done. I have tweaked to what works for me so feel free to do what you think works best for your models and your scenes.


On Material Editor for EACH skin material :
  1. Highlight color to WHITE
  2. check Variable Highlights - Edit Function - Link Highlight to map (grayscale)
  3. set Global Intensity and Global Size to 10%
  4. Bump - Edit Function - Link Bump to texture map (grayscale) - Depth to 0.01

For the lips (after applying the previous changes:
  1.  Change the Overall Color to the tone you want (in a very light tone)
  2. set Global Intensity to 80% and Global Size to 50%
For the face and neck I use Global Intensity at 35% Looks nicer I think.

Don't mind the quality, left is on ultra and right is on broadcast.


RENDER QUALITY

One more thing I'll add here is the comparison of the quality of the renders, so you can choose  what works best. The renders were the same size (the full image not the strips I show) and the time in the image is how long it took to render, so you can compare quality versus time. Those images were rendered before Skin adjustments. Actually no material adjustments at all.


*I* personally dont think the quality difference between broadcast and Ultra is that huge (at least for my hobby purposes) and I dont think its worth 3 times the time. but every once in a while its nice rendering the full quality. You choose.

Anyways, have fun!